Creating A Blog
Thursday, December 07, 2017
 1. Before you can start blogging you must first create a Blog. In your SiteApex admin head to Modules beside the "Site Map". On the left side of the page scroll down until you see "BLOG" and click on it. This will bring up the Blog panel at the top of your page.
2. Once there, click on 'add blog' at the top right of your screen
3. Fill in the following details of the new blog on the 'add blog screen' (as seen below in the screenshot).
Blog Name - this is the name of your new blog
Blog Owner - choose the owner and main admin person for this blog from the drop down list (note - this list will only show users who are a part of the blog users security group). Whoever you set as the blog owner is the main person who can add new posts, moderate posts, etc.
Click 'Submit' to save. Read here how to place your blog on your SiteMap.
Option Blog Settings...
1. Before you can start blogging you must first create a Blog. In your SiteApex admin head to Modules beside the "Site Map". On the left side of the page scroll down until you see "BLOG" and click on it. This will bring up the Blog panel at the top of your page.
2. Once there, click on 'add blog' at the top right of your screen
3. Fill in the following details of the new blog on the 'add blog screen' (as seen below in the screenshot).
Blog Name - this is the name of your new blog
Blog Owner - choose the owner and main admin person for this blog from the drop down list (note - this list will only show users who are a part of the blog users security group). Whoever you set as the blog owner is the main person who can add new posts, moderate posts, etc.
Click 'Submit' to save. Read here how to place your blog on your SiteMap.
Option Blog Settings... Adding your Blog to a Page
Thursday, December 07, 2017
 Adding your Blog to a Page
Now you will need to add your new blog to a page on your website. You can do this by editing a page in your sitemap.
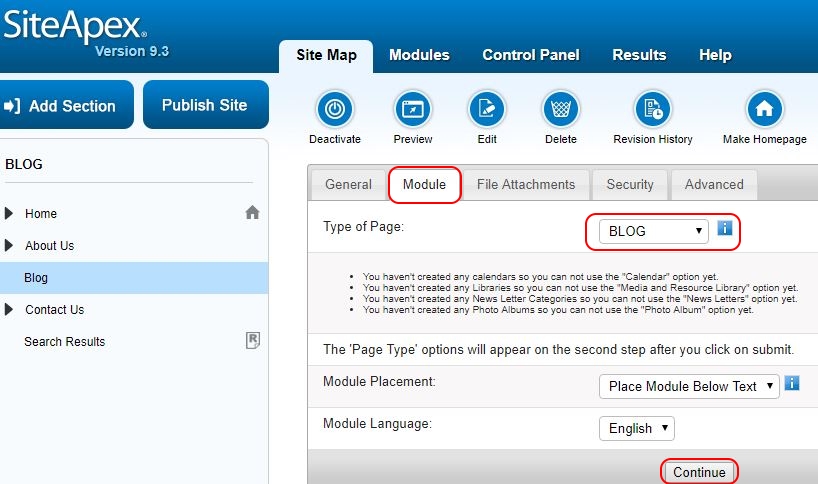
Create a new Section, Category or Page in the Site Map or open an existing page for editing.
Click on the module tab.
In the "Type of Page" drop down box, select BLOG and click "Continue" at the bottom of the page.
You will be prompted to select the Blog you wish to add.
Select the Blog you have just previously created and click "Save Changes" to Publish later or "Save Changes and Publish" to make it live.
Adding your Blog to a Page
Now you will need to add your new blog to a page on your website. You can do this by editing a page in your sitemap.
Create a new Section, Category or Page in the Site Map or open an existing page for editing.
Click on the module tab.
In the "Type of Page" drop down box, select BLOG and click "Continue" at the bottom of the page.
You will be prompted to select the Blog you wish to add.
Select the Blog you have just previously created and click "Save Changes" to Publish later or "Save Changes and Publish" to make it live.